How To Create and Add Watermark To Lightroom? Step-by-Step Guide

Everyone wants to become an authority in his work, the same is the case with photographers who edit their photos in Lightroom. However, if you are a beginner and want to protect your work from illegal use then I’ll tell you different ways to add watermark to Lightroom MOD APK. It will help to safeguard your images and stop posting by anyone on their social media profiles.
I also love to create my watermark in Lightroom Classic and I’m going to reveal these secrets with you. You can create watermarks either in the form of Graphics or text for professional branding of your work. Come with me and do wonders in editing with Lightroom.
Things To Know Before Add Watermark To Lightroom
Before creating or adding watermarks to your images you need to know things about watermarks. When I add photos in Adobe Lightroom then I used to add watermark to Lightroom to my pictures to protect them from plagiarism. I used two types of watermark text or graphics. The text includes your name or copyright to your images. While graphics watermark will include a logo or image to your photos.
It is straightforward to create or add watermark to Lightroom and apply them to the images during export. You can apply them to the multiple images at once.
Add Watermarks To Multiple Images While Export
Start editing your pictures and before exporting add a watermark to them. Lightroom Classic has the option to add watermarks to a single or multiple images at once. If you are adding a watermark to multiple images then click on the first one and last one image while holding the shift.


To apply or add watermark to Lightroom to non-consecutive photos click all the photos one-by-one. While clicking the pictures hold down the Ctrl key in Windows and for Mac use CMD.

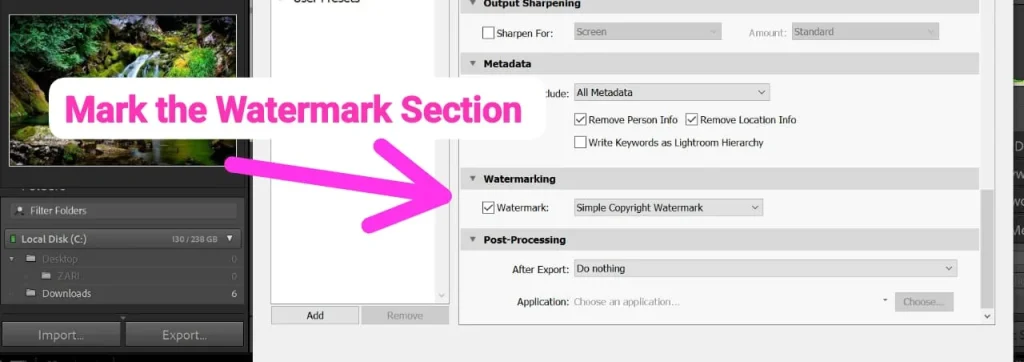
Then export the images and during export click on the watermark and you can choose what you have created before. You can choose between text or graphics.
If you are applying a watermark for the first time then you need to create watermarks and for this Go to “Edits”.
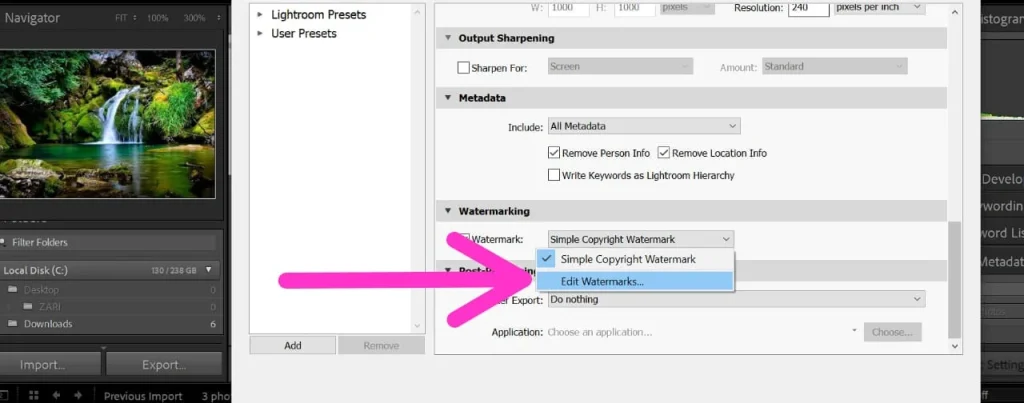
How To Create A Text Watermark?
Now, I’m going to share a step-by-step guide to creating a Text Watermark.
Step 1: Open the watermark style and choose the text option.
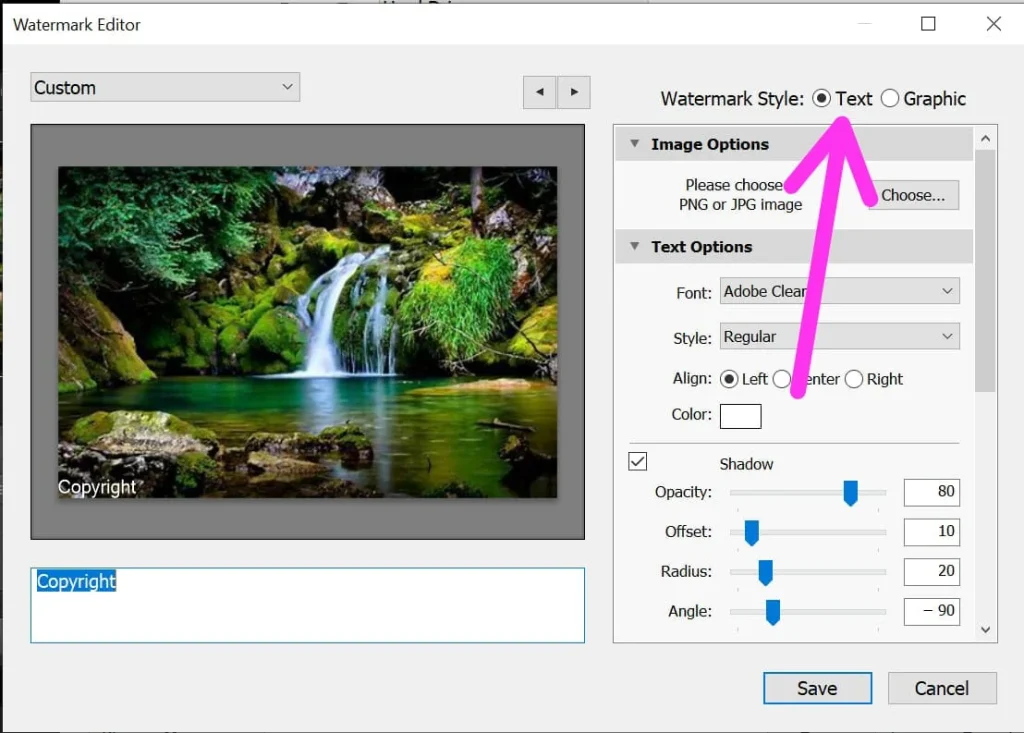
Step 2: You can add a name to the text and can choose “Copyright” or any brand name.

Step 3: For quick editing, you can use the Adobe Lightroom shortcut Alt key and type 0169.
1- Customize Your Watermarks
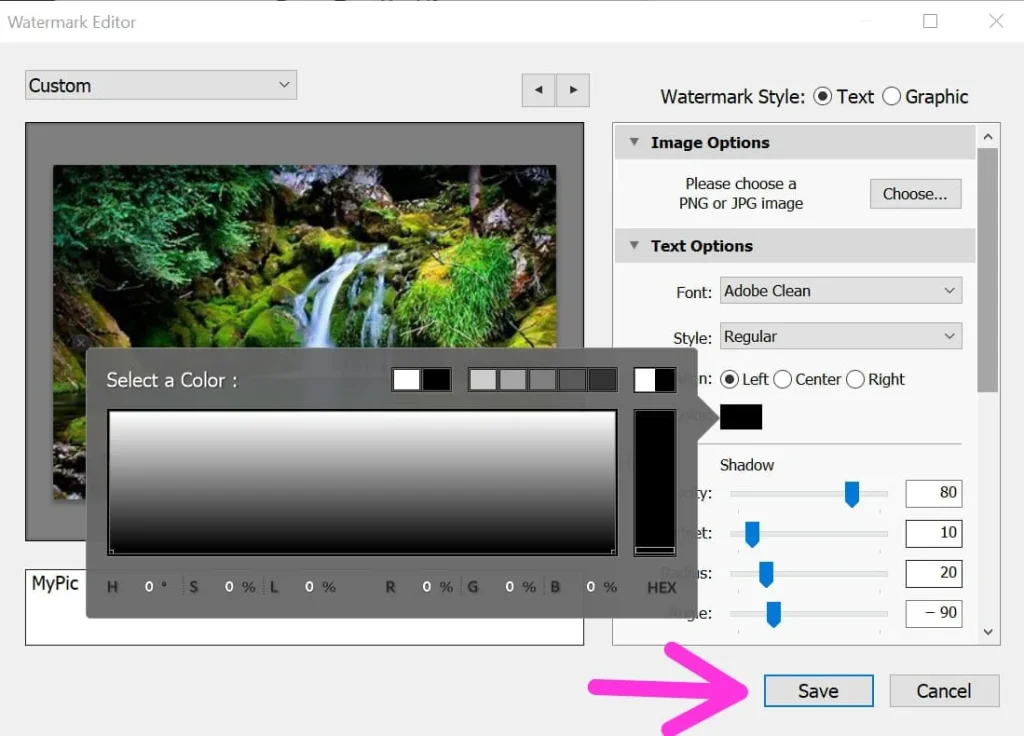
Lightroom has different customization options for watermarks. As for text watermarks you can choose from different font styles.
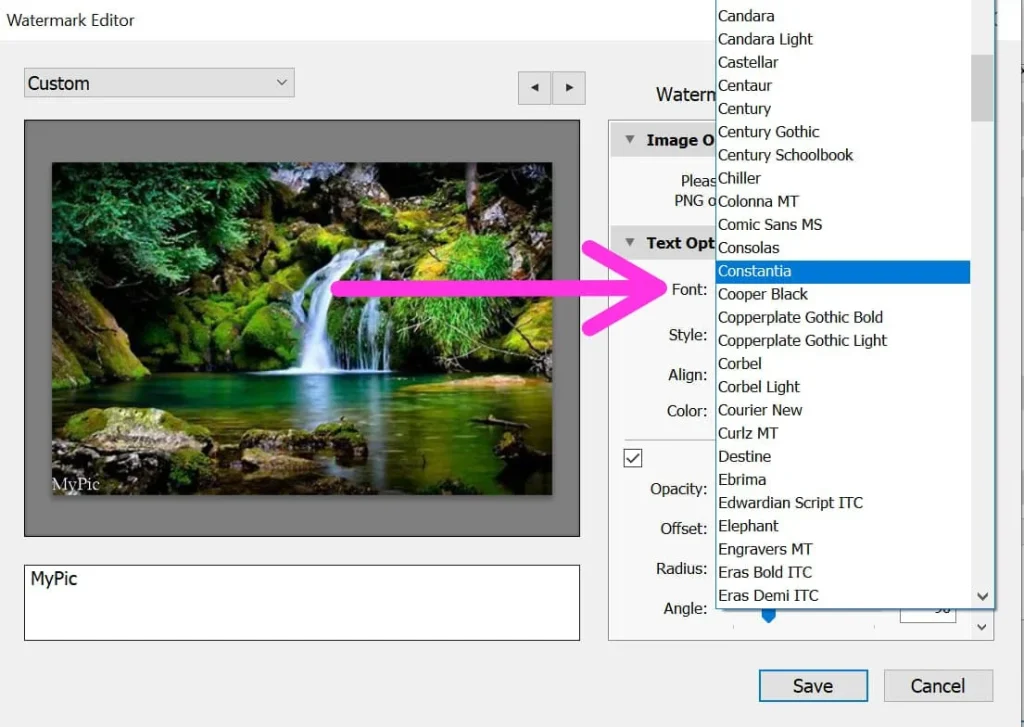
Then apply this font style to your text.
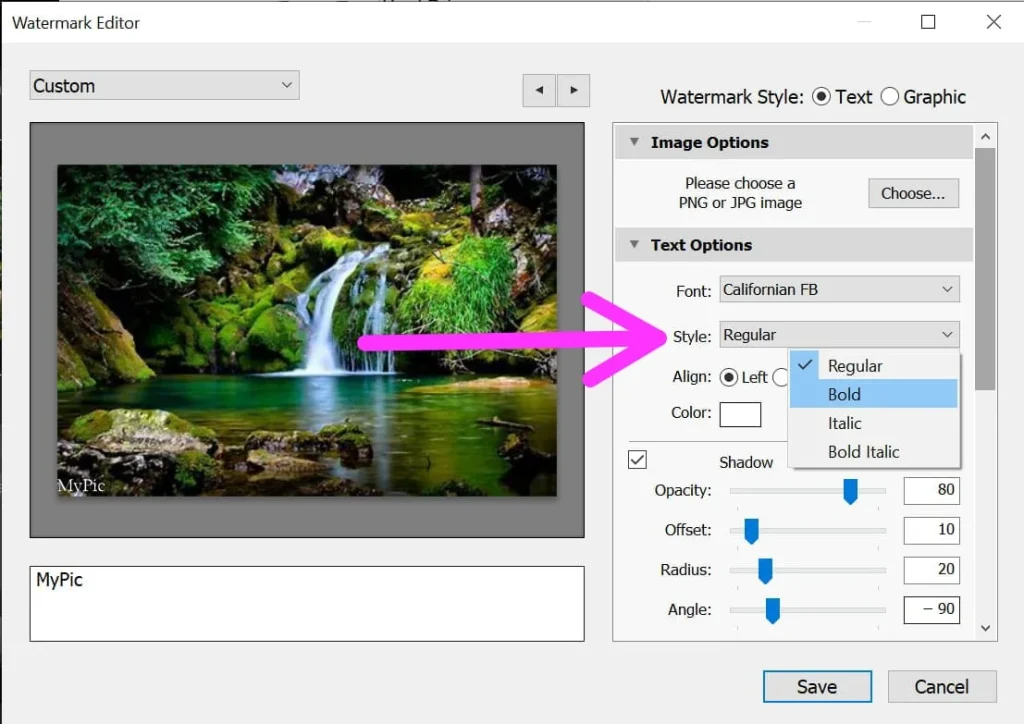
You can also control offset, and opacity and can also add shadows to text.
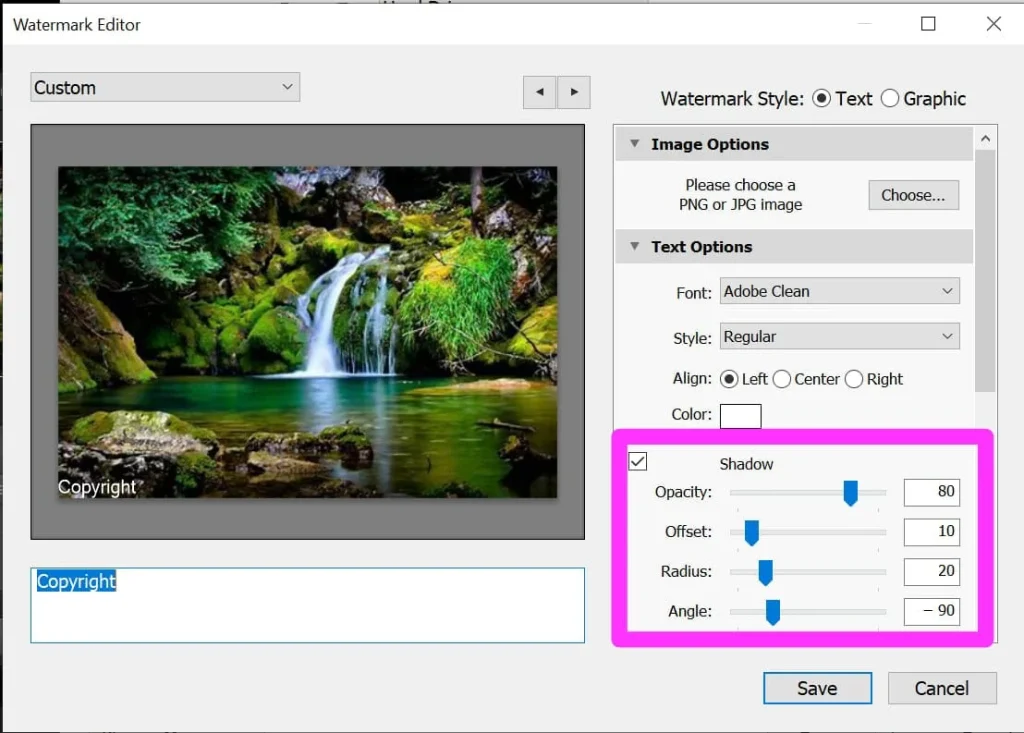
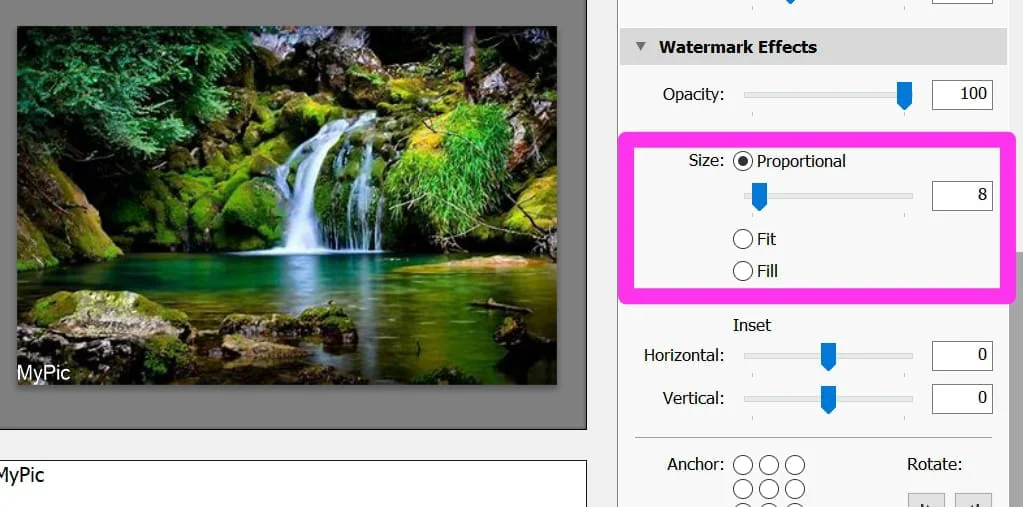
Besides that set its opacity to make it more visible to your pictures. You can also adjust its size or can click on “Fit”. The size of the watermark will be adjusted according to your photo.
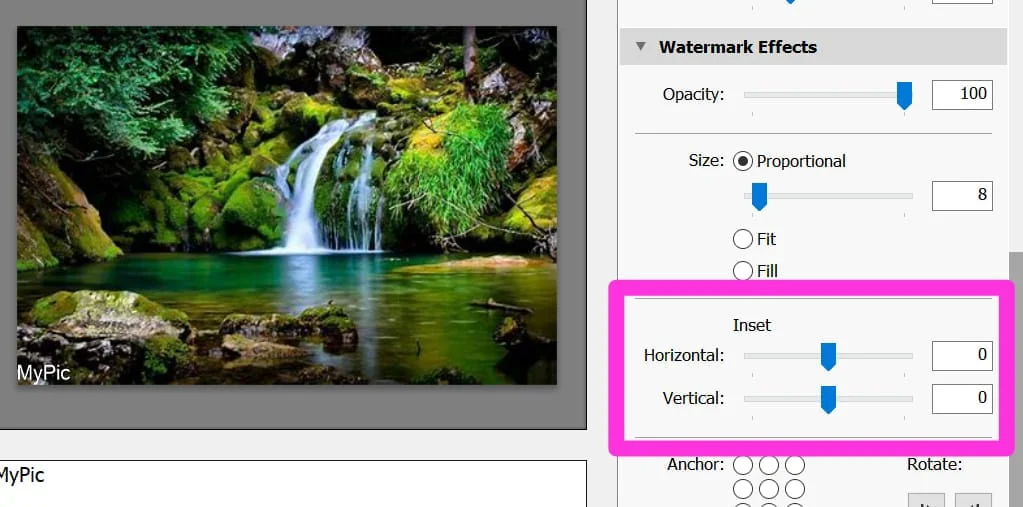
Margins of watermark are in your hand. Click on the insert and get control over horizontal and vertical margins.
The final step is to set the position of your watermark using Lightroom positions one out of 9. Moreover, you can also use “Rotate” arrows while setting its position.

You can also change the color of your watermark.

Then, review it and make changes as you want.
2- Save the Watermark With an Explanatory Name
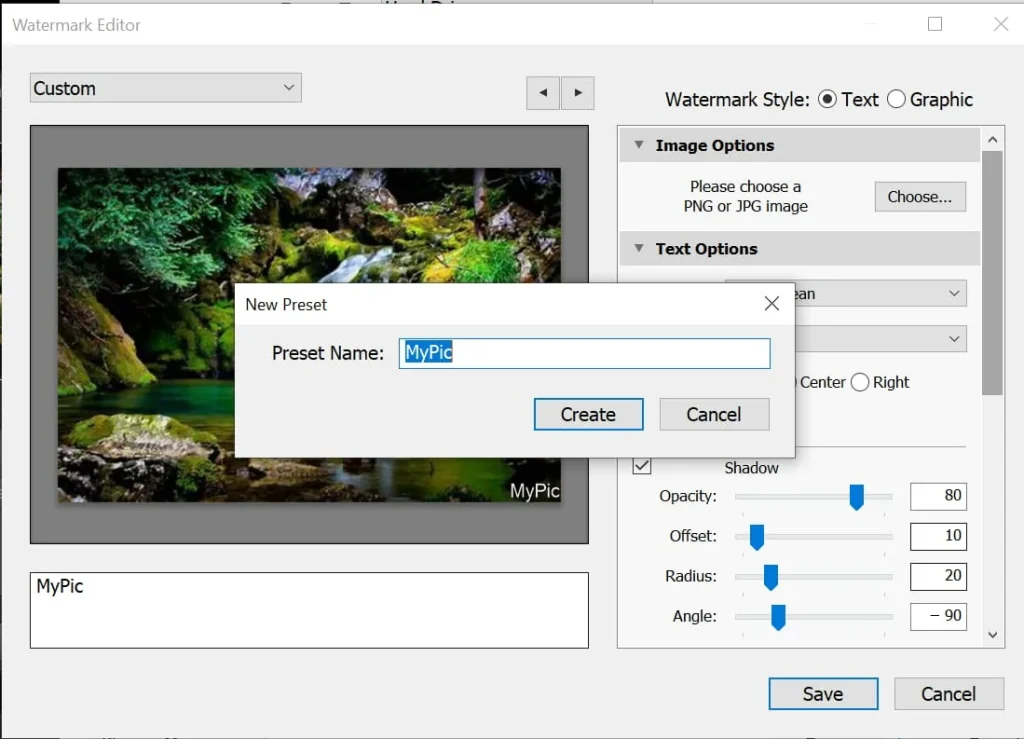
Once you have done editing then save it as your watermark. Give some time to the name and save your watermark with self-explanatory names like “Copyright+Name+Position”. You can add it to the preset name.
3- Apply Watermark To Your Images During Export
This is the final step to add watermark to Lightroom to the image but make sure that the watermark box is checked. Export the images and the watermark will be adjusted automatically. To make the process faster and easier click on the preset in the export dialogue and the watermark will be adjusted.
How to Apply A Graphic Watermark in Lightroom?
Let’s apply a graphic watermark in Lightroom.
- Click on the “Edit Watermark” option present at the top navigation in Lightroom Tb.
- You can select the “Graphic Option” at the window’s top right corner.
- Here you can choose the watermark that you have created.
Then after selecting Graphic Watermarks, it will be applied to all your images. Now you can select its position which is mostly on the image’s right hand.
How To Add Watermark in Lightroom Mobile?
Adding a watermark in Lightroom mobile is straightforward and is given below:
Step 1: On your mobile screen you will find an “Export” option in the top right corner. Just click on it.

Step 2: You will find a new menu when you click on the “Export as” option.

Step 3: From here turn on the “Add watermark” option.

Step 4: Here you will find two options create a watermark or an import watermark. It’s up to you to follow the screen commands to create or add a watermark.
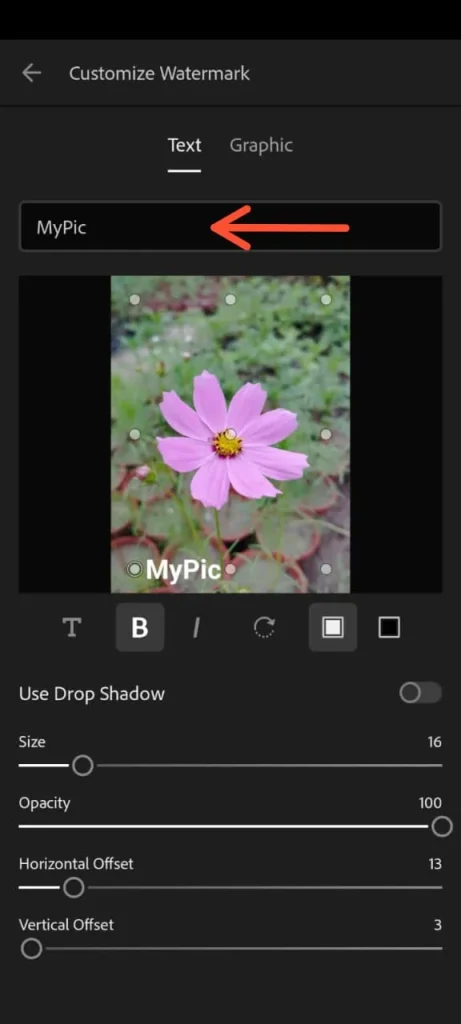
Step 5: When you have selected the watermark then you can customize it according to its font style, opacity, alignment, and position.
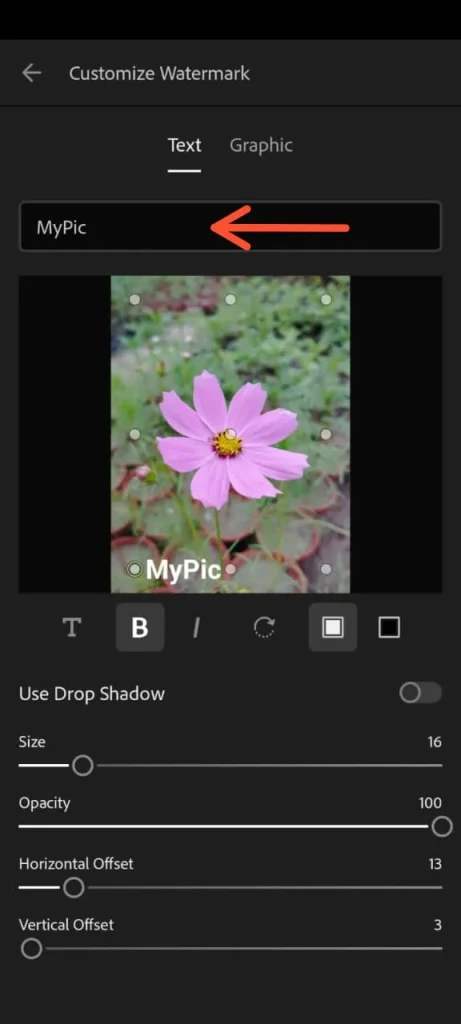
Step 6: Preview it and export your image.
Why Use a Watermark?
Two main reasons force me to use a watermark on my photos edited in Lightroom.
1- Professional Branding with Watermarks
People add watermark to Lightroom on their photos for professional branding. If someone gets inspired by any professional photographer then they start using its watermark on their images. If you want to create a watermark based on professional branding then follow the above guidelines and create a unique watermark that will alleviate your work.
2- Using Watermarks for Legal Protection
If you want to protect your photos legally then add watermark to Lightroom as it sometimes happens that people use your content on their social media profiles. They crop or remove the watermark with the help of tools.
So, I suggest using a watermark at the center of your photos thus it will reduce the chances that someone will use your photos illegally. So, try to make a professional logo watermark or you can get help from a designer.
Conclusion
I’ve shared methods to add a watermark to Lightroom for the protection of your work. Both desktop and mobile users will get equal benefits with it and can create their watermarks. Apply these above methods and create the watermark with the brand name and customize it to add copyright to it.
It is better to position it in the center of your photos thus no one can post it on their social media platforms. It will also help to establish your brand identity which will enhance your workflow and give you more control over your projects.


