How To Blur the Background in Adobe Lightroom? 3 Effective Techniques

You have often seen the picture where background objects distract the main subject in the picture. In this case, you need to blur the background in Adobe Lightroom. I use this method to make my pictures look more professional and stylish. Moreover, it makes the objects more clear in the picture. Adobe Lightroom has multiple blurring tools including blur lens, AI masking, and brush tools.
I will share straightforward steps to blur the background of your images. Follow the given steps and make your pictures more perfect and professionally attractive. I’ve also discussed multiple reasons behind this blurred background. Let’s find some useful tips to blur the background in Adobe Lightroom.
When is there a need to blur the background in Adobe Lightroom?
There are different conditions when you must blur the background in Adobe Lightroom. One of the main reasons is that the background objects distract attention from the main objects. The other is to give the picture a stylish and professional look by hiding the background objects.
How do you Blur the Background in Lightroom CC vs Lightroom Classic?
Lightroom has different versions, such as Lightroom CC and Lightroom Classic. Both are perfect for blurring the background and have the same method. The difference comes only when finding the masking sections in both versions of Lightroom MOD APK. At the right-hand toolbar, the same icon is present for Lightroom CC.
Techniques To Blur Background in Lightroom
I will tell you three different techniques to blur the background in Adobe Lightroom.
1- Blur The Background in Lightroom Using Lens
The lens is the most advanced AI technique to blur the background in Adobe Lightroom. It identifies all features and saves you time when blurring the background. It also has brushes to blur the background objects thus providing great control over tools.
Step 1: Open the Image and Find the Lens Blur
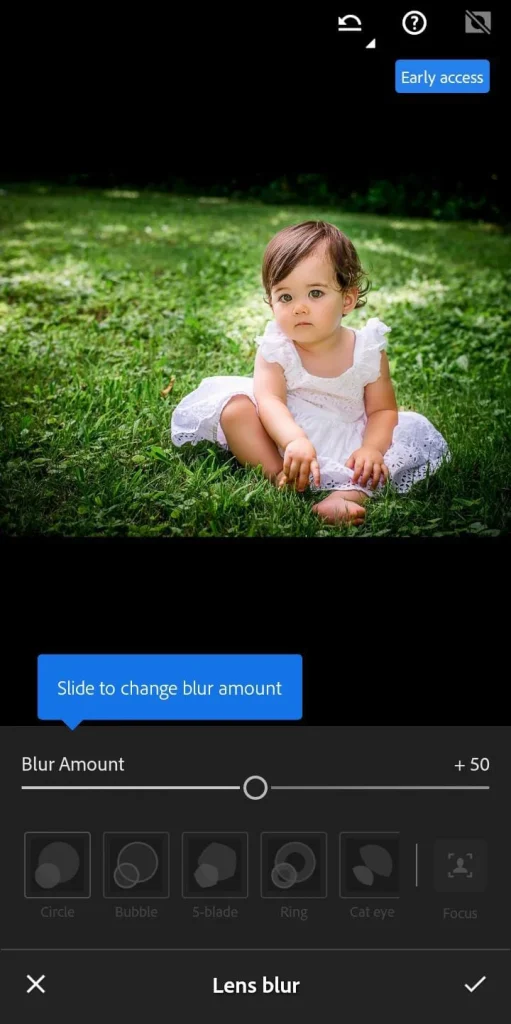
Open the image in Lens Blur and click it to apply the lens from the lens panel.
Step 2: Set The Blur Amount
There are two options for setting the blur. The first one is blurred amount, and the second is Bokeh Style. Bokeh has five different styles that you can choose to apply blur.
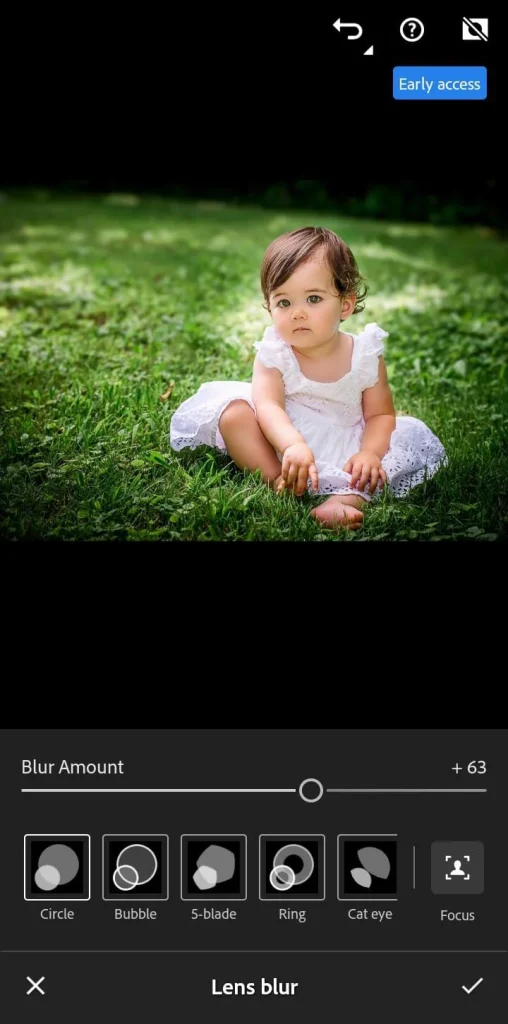
Step 3: Set the Blur Distance
You can set the blur distance in your image using the focal range slider. This AI technique works superbly.
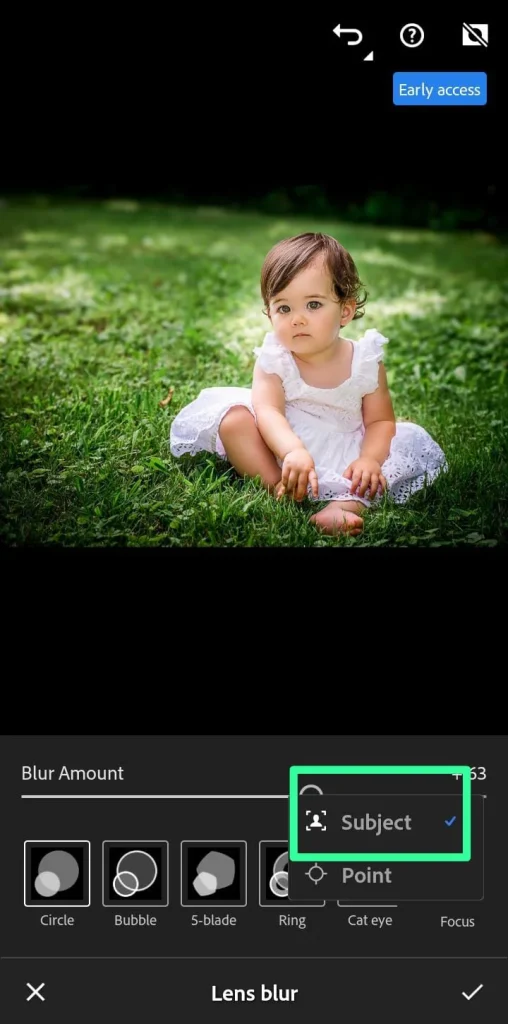
Step 4: Tune Your Selection
Give a fine tune to your blurred areas using a brush tool. You can customize this tool and set the blur amount.

2- Blur The Background in Lightroom Using an AI Mask
As great advancements are involved in the digital world Lightroom has some advanced features including AI Masking to blur the background in Adobe Lightroom. Let’s see how this technique works.
Step 1: Select the Image and Mask icon
Open the image and then proceed to develop the module.
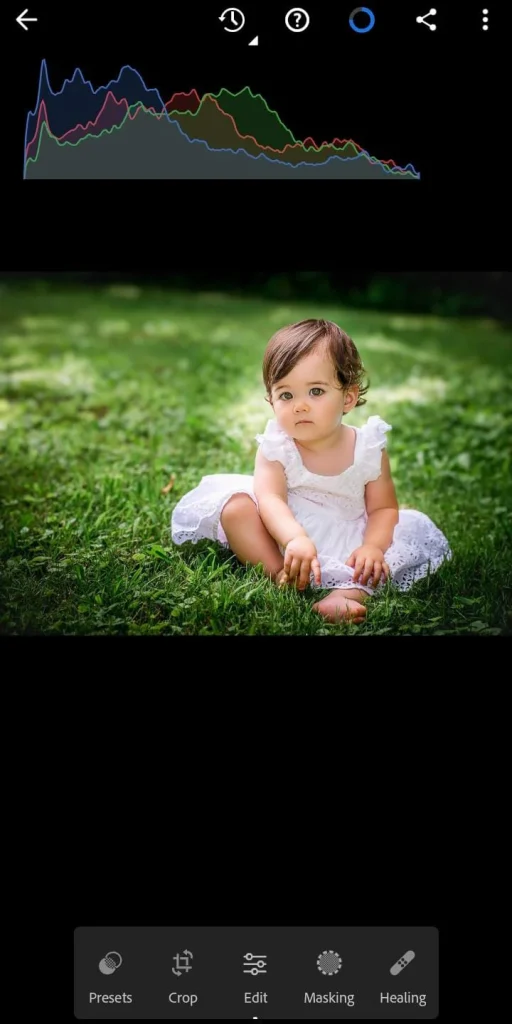
The histogram contains many masking icons, so you need to click the masking icon. Use the Lightroom Shortcut Key “Shift + W” to simplify the process.
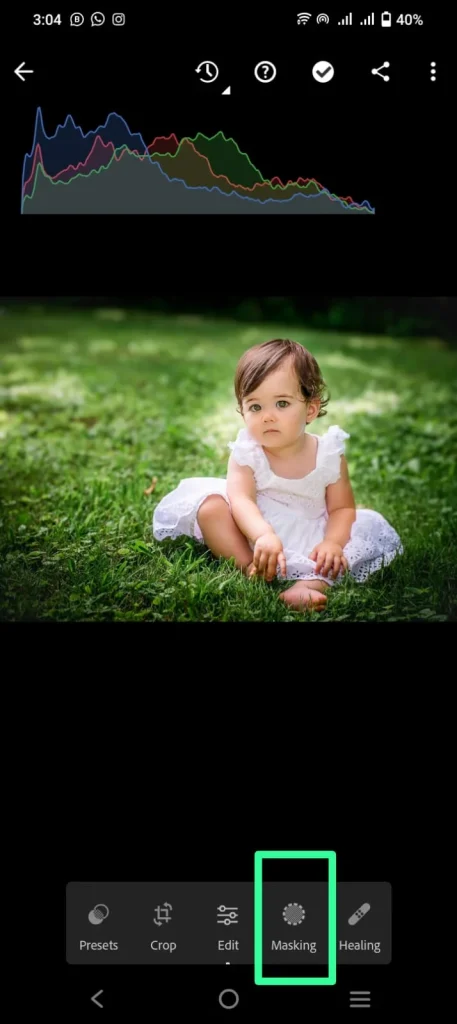
Step 2: Add a Subject Mask (Option 1)
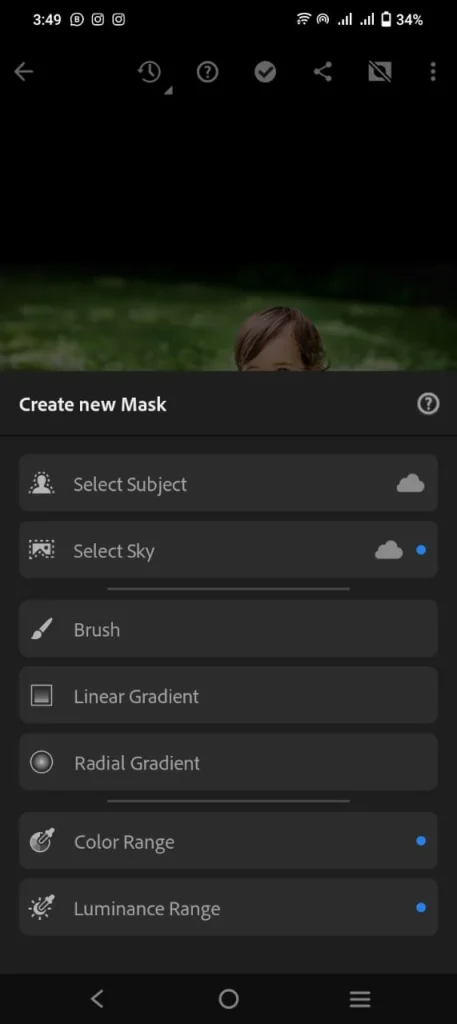
It involves different options for masking you can select “Subject Mask” if you want to blur everything in the picture.
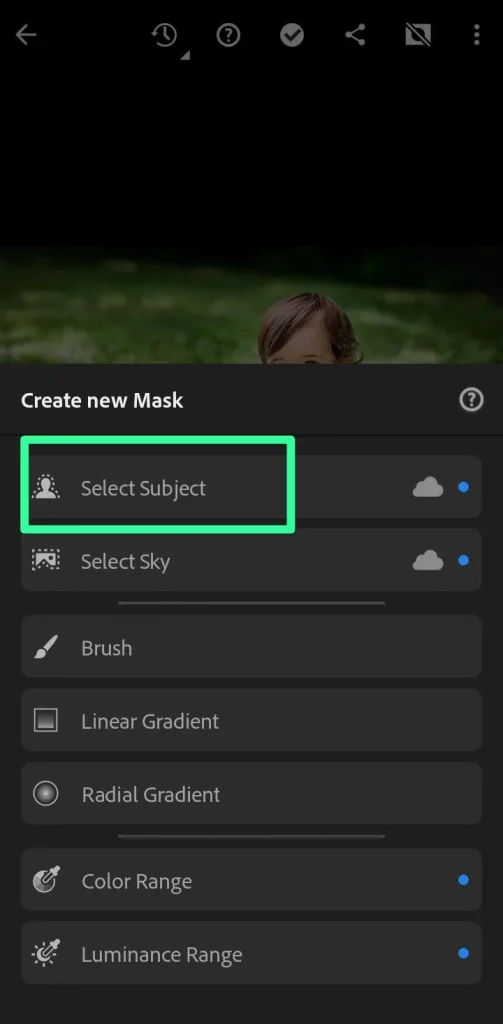
AI feature masks the objects in the picture; if you want to mask other objects besides that, you can also use other options. You can also use its options to remove the subjects from masking.
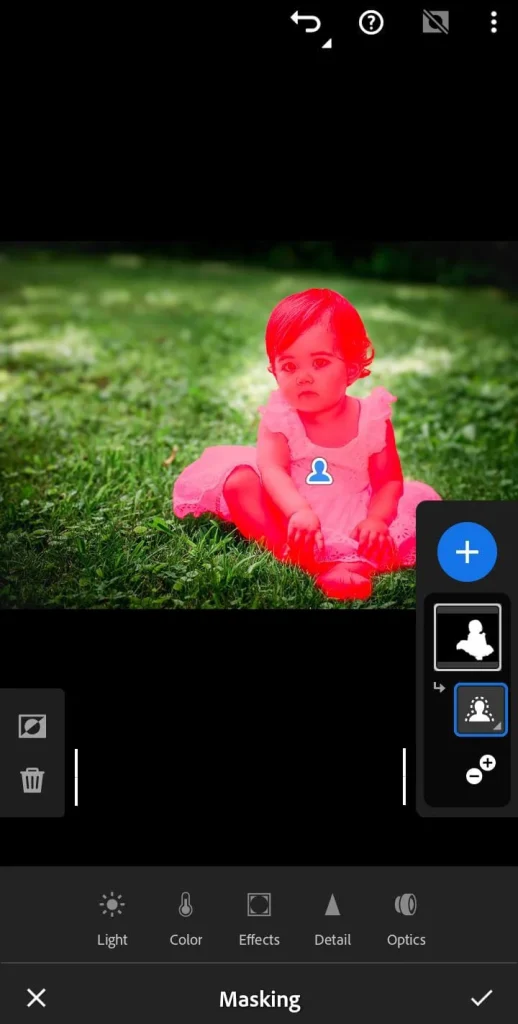
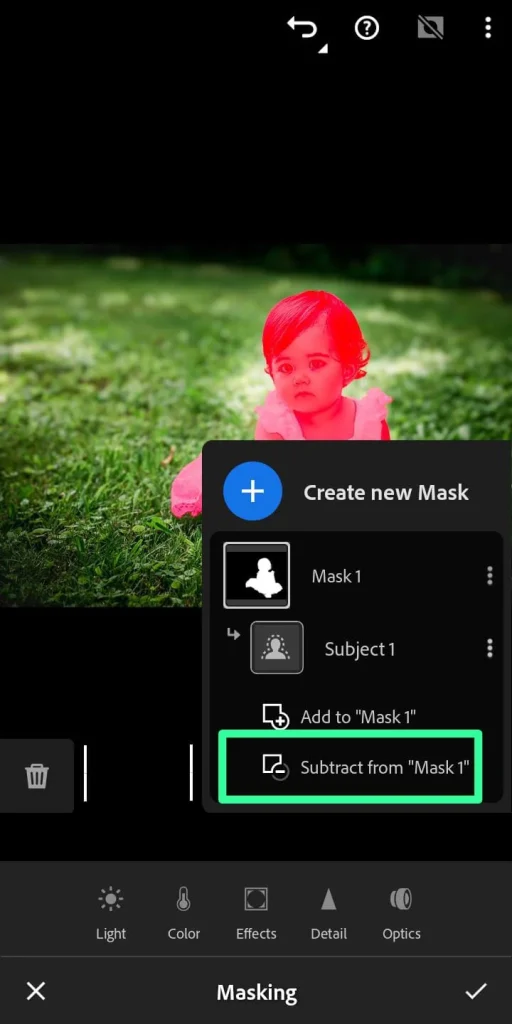
Click on the “Subtract Box” to remove this object from masking. Here are also some brush tools you need to learn.
Blur the parts you want using brush tools.
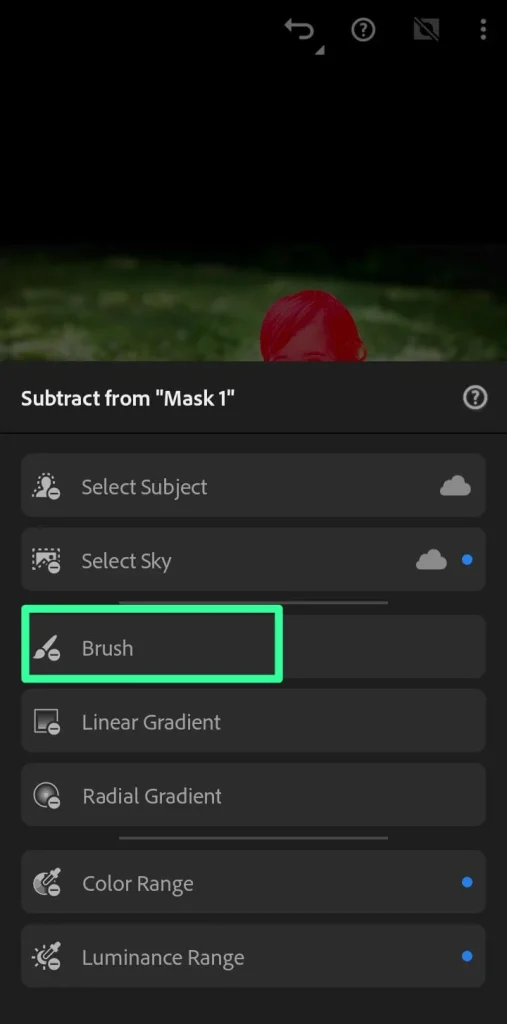
Use these brush tools to blur the parts in the images.
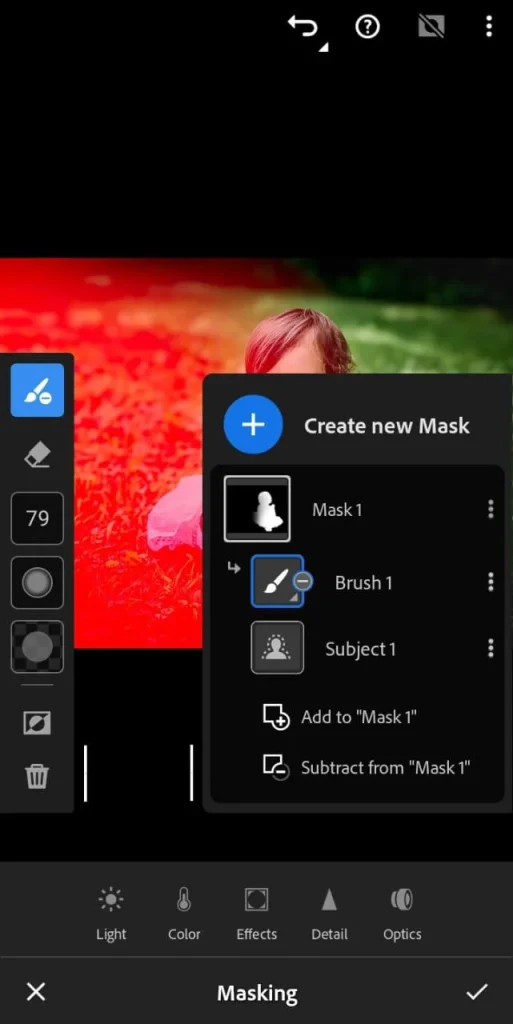
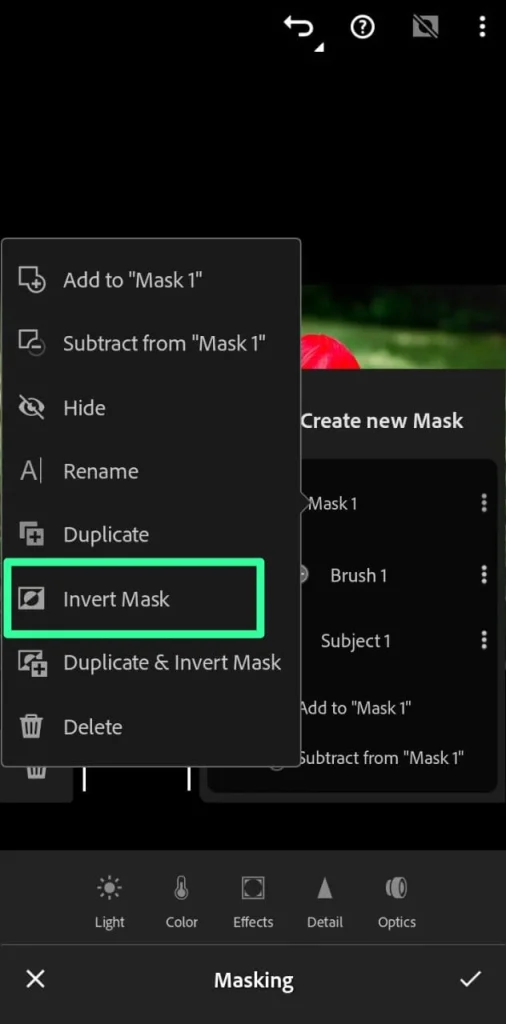
If your subject is fully masked then you can invert Mask 1.
Here is how your image will look.

Step 2: Add a Background Mask (Option 2)
Use Lightroom’s advanced background mask feature to make the above process quick. Click on it and get the whole same process in no time.
Step 3: Use the Sharpness Slider To Apply Blur
This is the final step in applying blur to the background. First, adjust the settings from the adjustment panel for the masking.
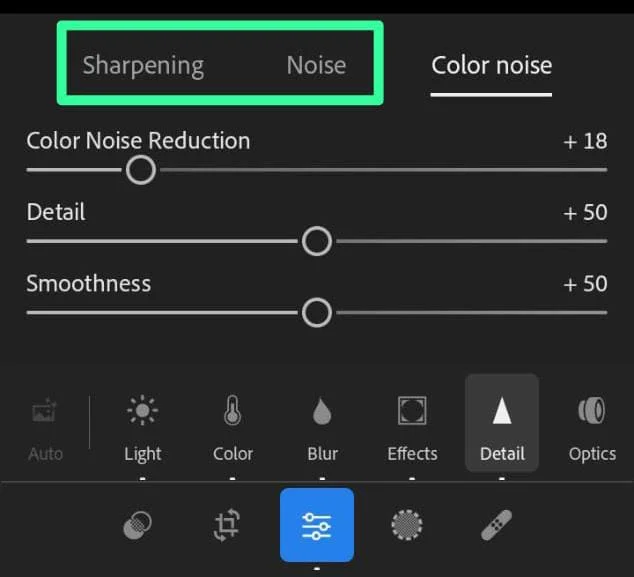
Find the sharpness slider in the adjustment panel for a blur effect. You can make sliders low and high to check the difference.
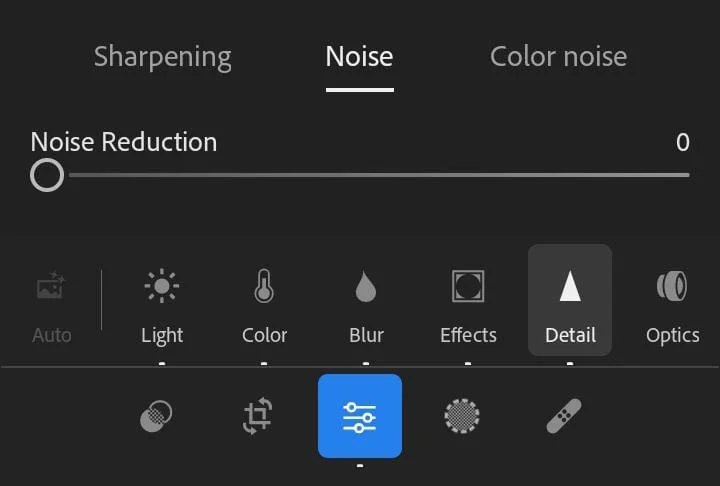
3- Using the Lightroom Brush Tool Blur Background
This is the third useful technique to blur the background in Adobe Lightroom using the Brush Tool. Brush tools have masking options to create a new mask and effect section to choose the preset.
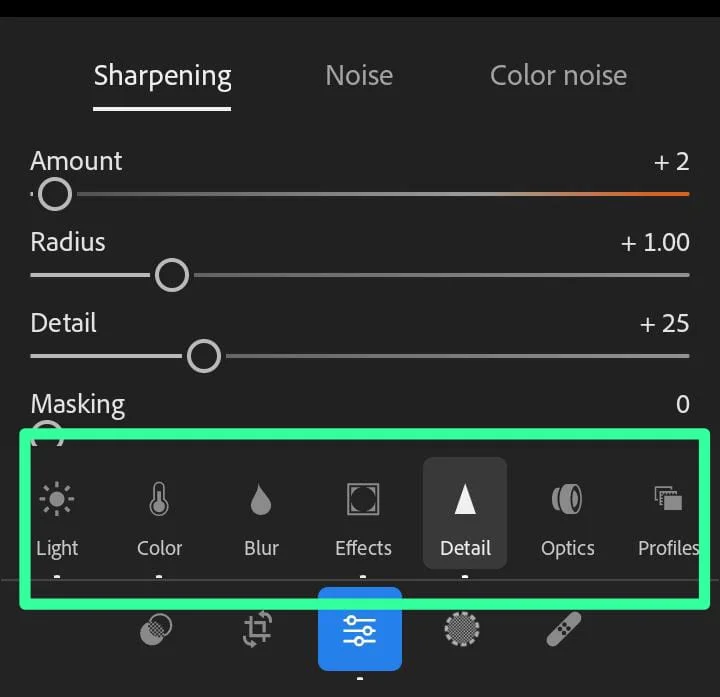
Brush settings involve several factors like,
- Size: Set the size
- Density: Set the strength of the brush
- Feather: To make the brush edges soft or hard.
- Flow: Set a value lower than 100 to strengthen the effect of the brush.
- Auto-mask: Make the borders more clear while painting.
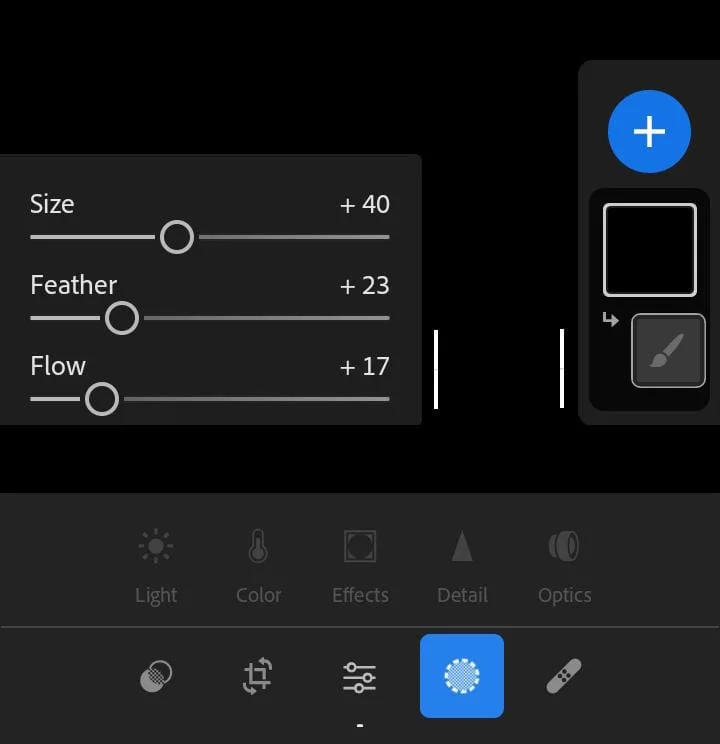
Step 1: Drop the Image and Open the Brush Tool
The brush tool is present in the Develop Module of Lightroom. Open the image and select the sharpening adjustment.
Step 2: Paint the Background By Adjusting the Sharpening Slider
Randomly paint the background by adjusting the sharpening slider to -100. If you want to show or hide the effective mask, use Lightroom Shortcut Key “O”. It helps to see the painting on the picture and brush effect. Start working around the edges by using the brush density, feather, flow, and tune the size.
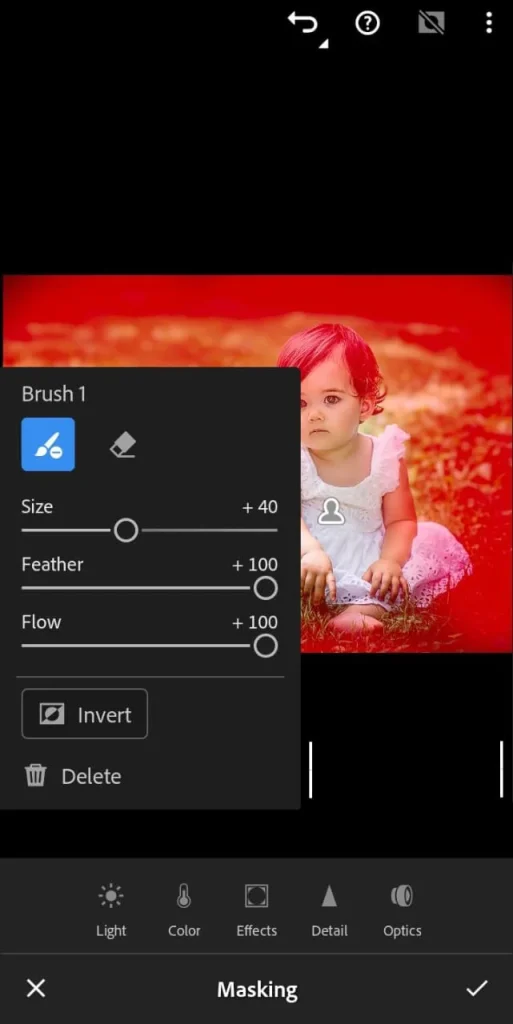
You can also remove the subject using the option of erase brush, which ensures that the blur effect has been applied to the background. A coarse mask provides a realistic blur, increasing as it moves from the focal plane.
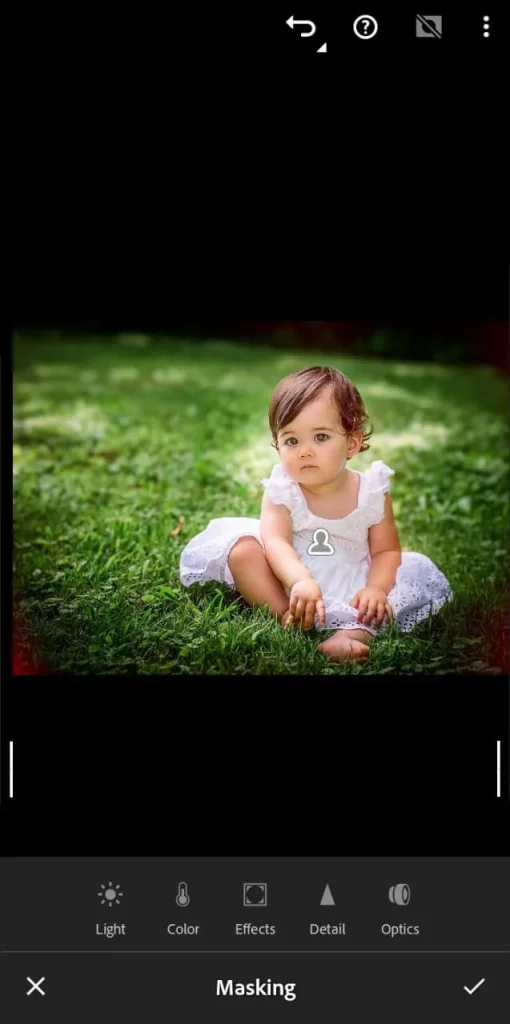
Step 3: Increase the Amount of Blur
Lens blur works when you set the sharpness to -100 but it is not visible so much. You can also duplicate the brush adjustments by simply right-clicking on the brush marker and duplicating the adjustments. This brush is adjusted as the previous one and set all sliders to 0 while the sharpness slider must be -100.
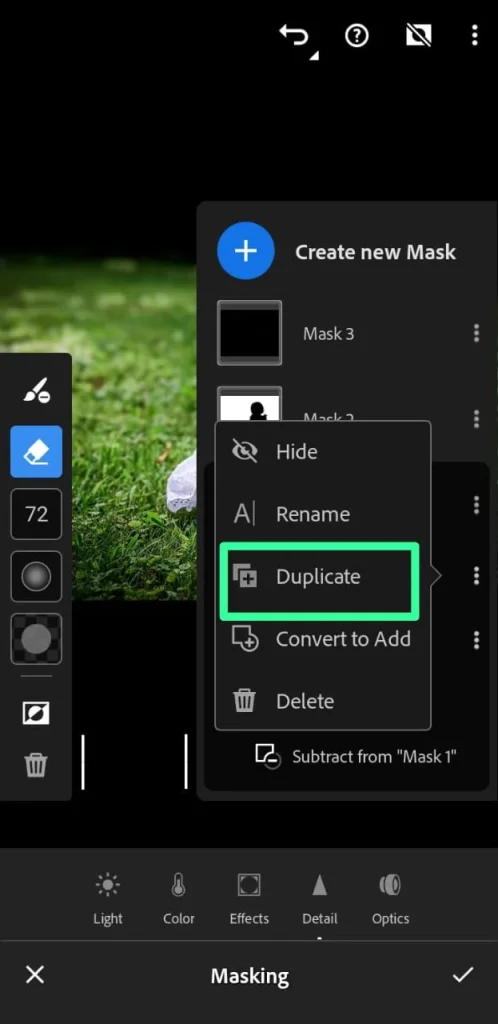
You can duplicate as many brushes as possible for the blur effect.
Step 4: Final Touch
This is the final step in making the final adjustment to your image to blur the background in Adobe Lightroom. Set all the sliders to 0 and the tone of your image. If you are satisfied with the image, export it, and you are done.

Reasons To Blur Background in Lightroom
There are multiple reasons for blurring the background in the photos; the most important is focusing on the object in the picture. People blur the background in Adobe Lightroom for dreaming style and to remove the unwanted elements in the pictures. Let’s discuss them in detail.
1- More Focus on the Object
When you take a picture of a public place, most people are the primary focus. It distracts the attention from the main object. So, to focus more on the objects, people look for tools to blur the background in Adobe Lightroom.
2- Adding Dreamy Style
Everyone wants to create dreamy style images and to provide a beautiful look they blur the background in Adobe Lightroom. Moreover, when I do my client’s work, that is the main reason I blur the background in Adobe Lightroom. I apply the right level of blur and make my pictures more professional.
3- Remove Unwanted Elements
Sometimes, people blur the background in Adobe Lightroom to make images clearer and flawless by removing unwanted elements. You can use low or high amounts of blur to hide the background objects and to apply light blur effects.
Tips To Blur Background in Adobe Lightroom
Some tips will help you naturally blur the background in Adobe Lightroom and polish your pictures professionally.
- i- Choose the Right Photo: To blur the background in any picture’s Adobe Lightroom, choose a distinctive image to achieve a natural-looking effect.
- ii- Adjust the Feather: Brush edges must be soft to create the blur effect, which can only be possible by adjusting the feather. Start with low, then increase it for a more natural and blurry effect.
- iii- Adjust the Density: The opacity of the brush plays an important role in blurring. Adjust its density and keep it low so it doesn’t overturn the background.
- iv- Use the Auto-mask Feature: This is one of the most advanced tips for blurring the background. Using the auto-mask feature which will detect the subject background and adjust the brush.
- v- Use Presets: To make the blurring process easy and time-saving create presets and use them.
How do I Blur the Background in Lightroom CC Mobile?
Follow the given steps to blur the Background in Lightroom CC mobile:
Step 1: Take an image with a Lightroom Camera or import the desired one.
Step 2: Activate the selective mode from the menu.
Step 3: Click the plus icon to open the selective tools menu from the left.
Step 4: Select your choice’s blur method (Brush, Radial, or Graduated Filter).
Step 5: Create a selective mask by dragging the image.
Step 6: There are various mask options that you can elect by tapping on the pin. You can duplicate, invert, or delete the mask.
Step 7: Search for the sliders which you will find in the menu.
Step 8: Then blur the background using a sharpening slider.
Step 9: Then save and import your image.
Conclusion
I hope so. It has been an interesting journey for you to learn more accurate facts about blurring the background in Adobe Lightroom. You need to upload the picture and apply one of the abovementioned techniques. Then, after editing your picture follow Lightroom Export Settings to export your images.
If you see that skin is not smooth in the picture, check my guidelines for smoothing skin in Lightroom. You can give your pictures a natural, realistic, professional, and stylish look. Give it a try!


