How To Create A Lightroom Collage? 6 Easy Steps
If you want to turn your beautiful pictures into a captivating collage then try Lightroom collage making features a wonderland of photo editing. Collect photos in a single frame to save them as a lifetime memory. I use the Lightroom Print module to make collages of my vacations or event photos even pictures with my friends in a single layout.
Besides making collages you can also edit your pictures using this well-known software. Its endless features will help you to add creativity to your work. Using its customization options you can change the background or add borders to the frame. Stay with me until we learn how to make a Lightroom MOD APK collage.
Value Of Lightroom Collage
Grouping the different photos in a single frame provides an amazing look and also enhances your feelings because now you can collect your memories in a single place just because of Lightroom Collage. Due to social media and evolvement of lots of mobile apps their popularity and demand are increasing day by day. Here, I’m going to tell the value of Lightroom Collages.
1- Wedding Photographer
Lightroom MOD APK Collage is not restricted only to casual photographers but benefits a lot to professional photographers. If you are a wedding photographer to demonstrate your work and make it more unique first take beautiful high-quality pictures then edit them to make a collage.
You can amazingly showcase your skills and creativity.
2- Grab Potential Clients
Lightroom collage is also valued by clients. It will help you grab more potential clients by showing your previous works and they can become your regular customers. On every occasion, they will invite you to capture their beautiful moments.
6 Easy Steps To Create A Lightroom Collage
I’m sharing with you detailed steps for making a collage using Lightroom. Read and apply them carefully to get the best results.
1- Import and Edit Photos
Select your photos and import them in Lightroom. Before adding them to the collage, edit your pictures or use batch edit in the Lightroom feature. You can make any changes of your choice.
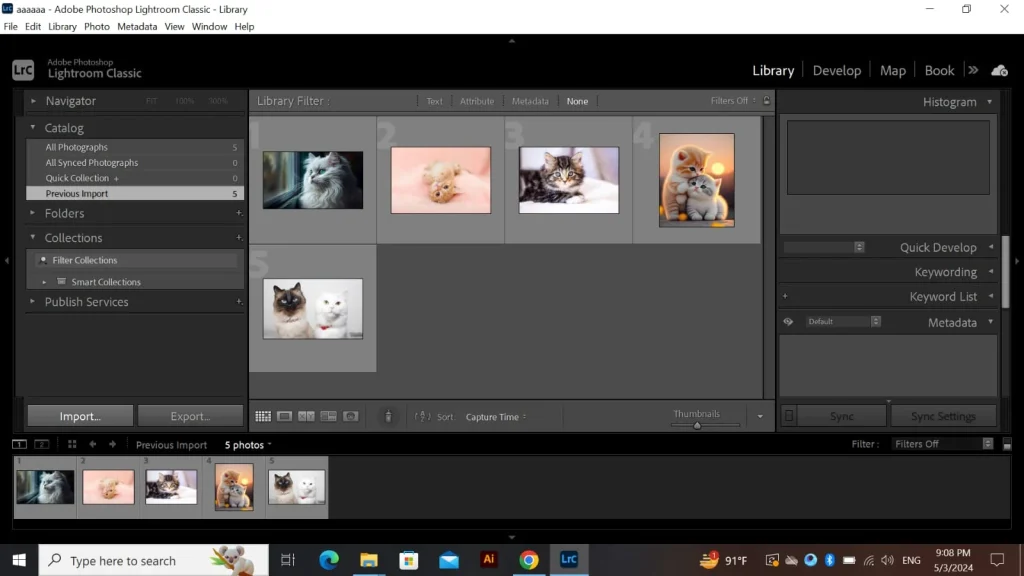
2- Arrange Photos
Open the Lightroom Print Module and arrange your photos to create a collage. Select any layout from different templates and drag and drop your photos. Adjust these pictures according to the frame as it will set the basis of collage creation. Bring your creative vision into play and do experiments to get the desired results.
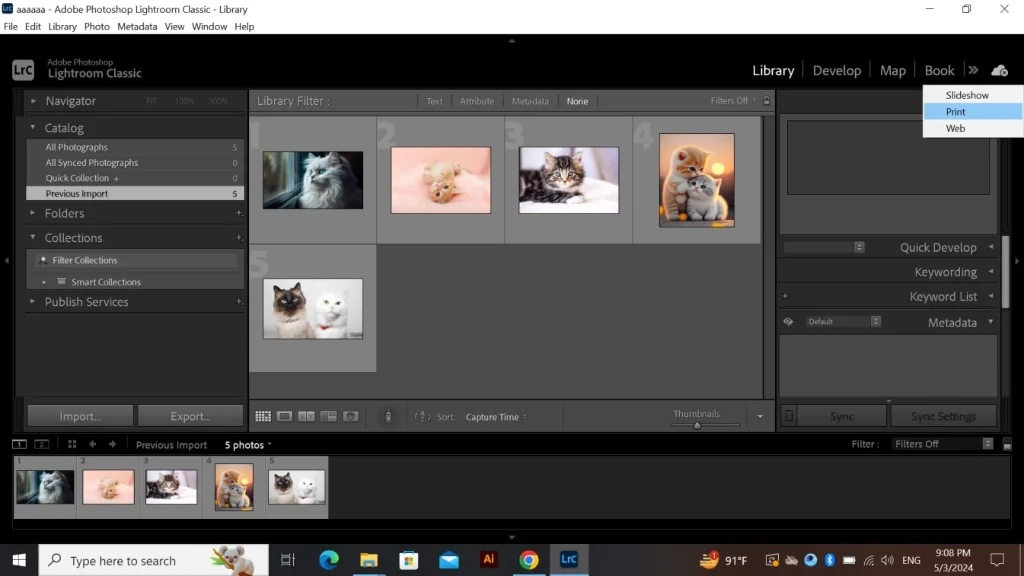
3- Select a Layout
Choose a layout template to organize your collage in the Lightroom Print Module. However, Lightroom has some advanced templates from where you can choose your favorite one for your collage. It will provide a stunning appearance to your photos.
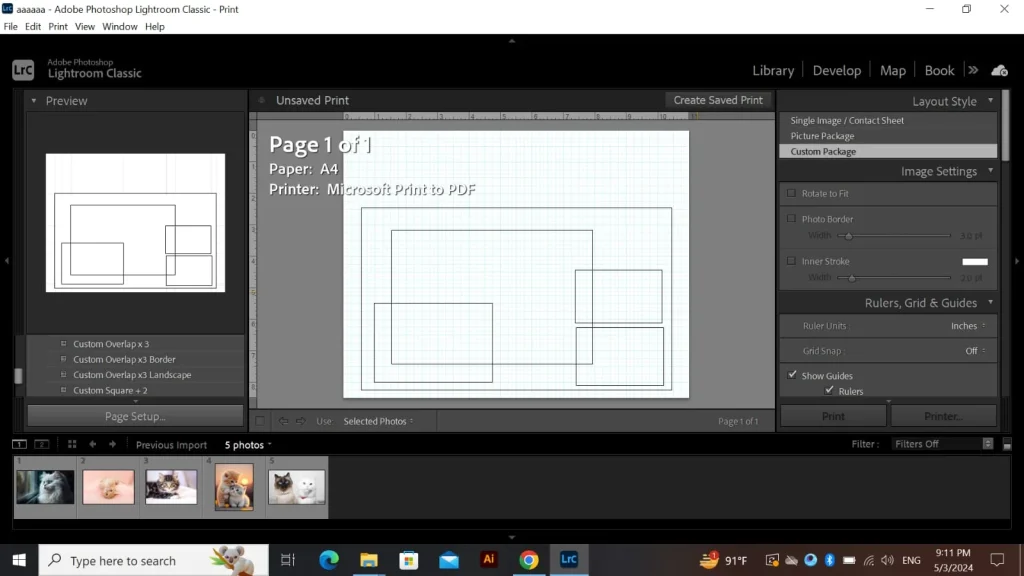
Tap on the desired template and all your photos will be arranged in it. Then to make an attractive collage design edit the spaces and number of cells in templates. You can do all these editing smoothly and effortlessly with the help of a user-friendly interface.
4- Customize Cell Settings
If you want to give a professional look to your Lightroom collage then customize the settings of each cell. Customize the spacing, and orientation and adjust the size according to the pictures. It will add balance to your creativity. Besides that, you can try other features to enhance the look of your images. Keep experimenting until you are satisfied with the results.
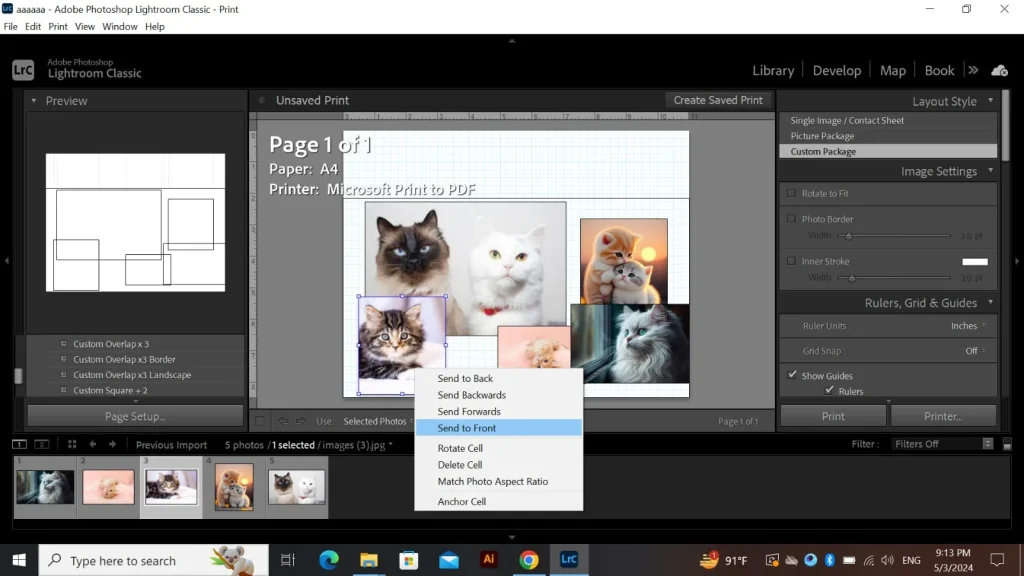
In this way, you will get complete control over the appearance of your collage.
5- Apply Borders and Backgrounds
The last editing technique that you can apply to your collage in the Lightroom Print Module is to apply borders and backgrounds. The addition of the border to an individual image or a whole collage will give an eye-catching look.
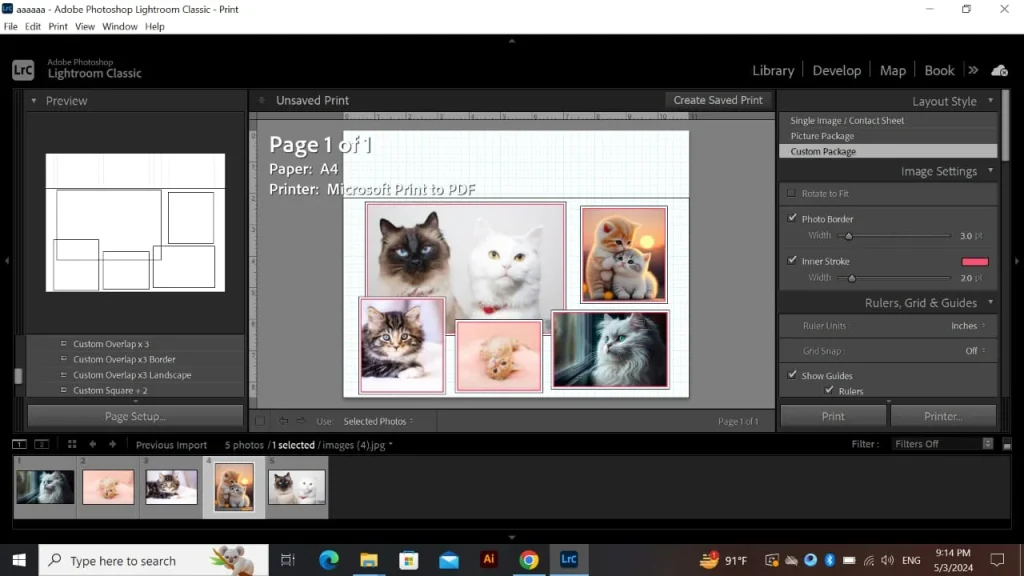
If you have added borders then the next step is to change the backgrounds. You can choose from a collection of backgrounds and change the look of your collages.
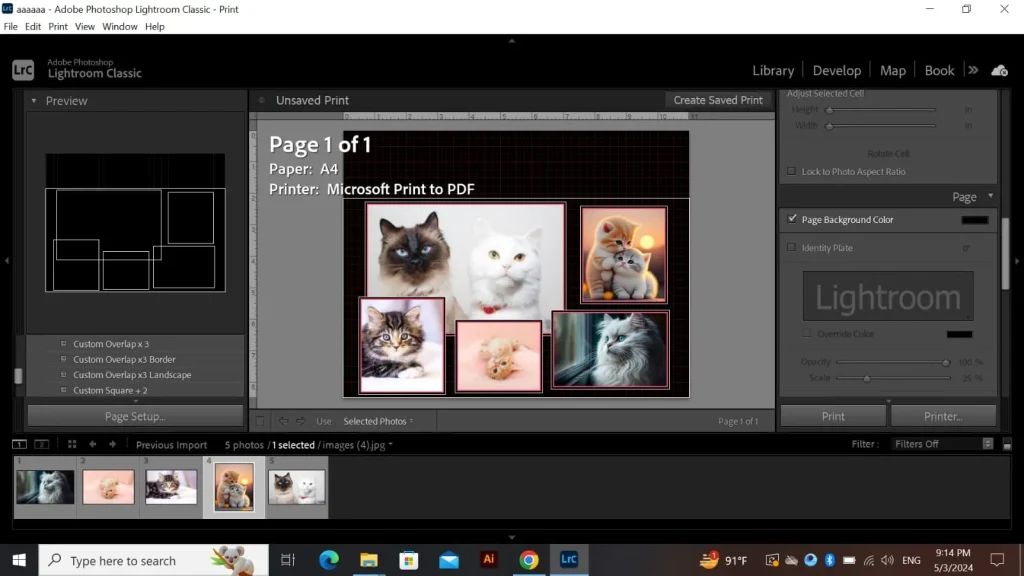
Again experiment with such tools of Lightroom and add borders and backgrounds to give the finished look to your collage. You can also add a watermark to the Lightroom collage. In this way, you can show it as your property.
6- Export Collages
If you have finalized your editing and your collage is ready then click on the “Print To File” button to export and save your work. Lightroom Collage print module also provides different options to export your project in different formats like (JPEG, TIFF, etc).

Congratulations!
You have done a great job now you can make a collage of any pictures.
How To Place Watermark on a Collage?
If you want to give a name to your edits or want to add a watermark on a Collage then you follow these methods to apply them. Open the page module and check the Identity Plate to upload the images. It will appear just once and you can drag this plate to any place where you want. If you want to adjust their scale and opacity then use the sliders.
Here, you will find an option of “Watermark” Options from where you can select the desired one or the one that you have used previously. However, adding a watermark to the Lightroom method doesn’t have many adjusting scales. You can check the details by visiting Add Watermark to Lightroom.
Create More Lightroom Collage Templates
I hope you have learned how to make collages in Lightroom, if you want to create your templates then I’m sharing some worthy points to consider for a more accurate and attractive look.
FAQs – Frequently Asked Questions
Conclusion
Let me conclude my words about creating a Lightroom Collage. Have you seen how easy was to create collages? It will enhance your editing and creative ability and you will be amazed with the results. If you are facing any difficulty while exporting images then read my guide Lightroom Export Settings. It will make the process a little bit easier for you.
I suggest you create a watermark and apply it to your collage so that no one on social media can steal it.

